To download the help file:
Synopsis:

The left window represents the directory list on your system.
The right window represents the list of the files of the selected directory.
In the center, you have the preview window. It allows to see picture or video or listen mp3.
The options presented below are also available via small Affichage
Option available:
![]() :
Albums Management. (File - > New Album)
:
Albums Management. (File - > New Album)
![]() :
Large icons view. (View - > Large icon)
:
Large icons view. (View - > Large icon)
![]() :
Small icons view. (View - > small Icon)
:
Small icons view. (View - > small Icon)
![]() :
Form list view. (View - > List view)
:
Form list view. (View - > List view)
![]() :
Detail view list. (View - > Details)
:
Detail view list. (View - > Details)
![]() : Thumbnail view (Only the readable picture formats will be shown) (View - >
Thumbnail)
: Thumbnail view (Only the readable picture formats will be shown) (View - >
Thumbnail)
The selected options are notched in the menu.
![]() : To access higher repertory (Edition - >
Directory Up.)
: To access higher repertory (Edition - >
Directory Up.)
![]() : Picture
navigator
: Picture
navigator
![]() : Picture processing
tool
: Picture processing
tool
![]() :
Search module
:
Search module
![]() : Folder
view
: Folder
view
You can also remove one or more files by selecting them with the Shift key or control (crtl) then while pressing on key DEL or go in small Édition - > Delete. The removed files will be those which were in blue. Caution!!! The removal of a file is your responsibility.
You have the possibility to show only recognized picture. (View - > Show Only picture).
The preview window show picture with an high filter quality optimisation.
It is possible for you to show and
unshow the list of the folder and the preview window.
It is enough to go to "View - Control" and select :
Directory : to show or unshow the list of folder
Preview : to show or unshow the preview window
An arrow shows you if control is active or not.
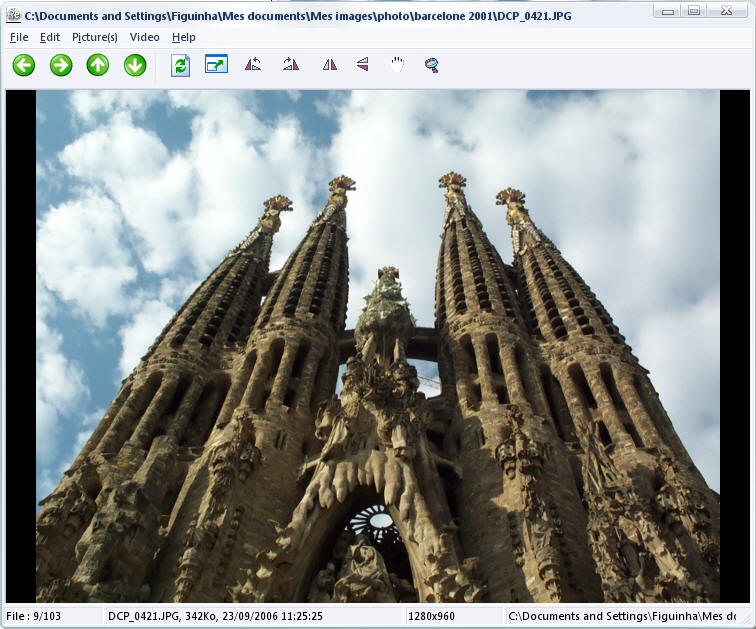
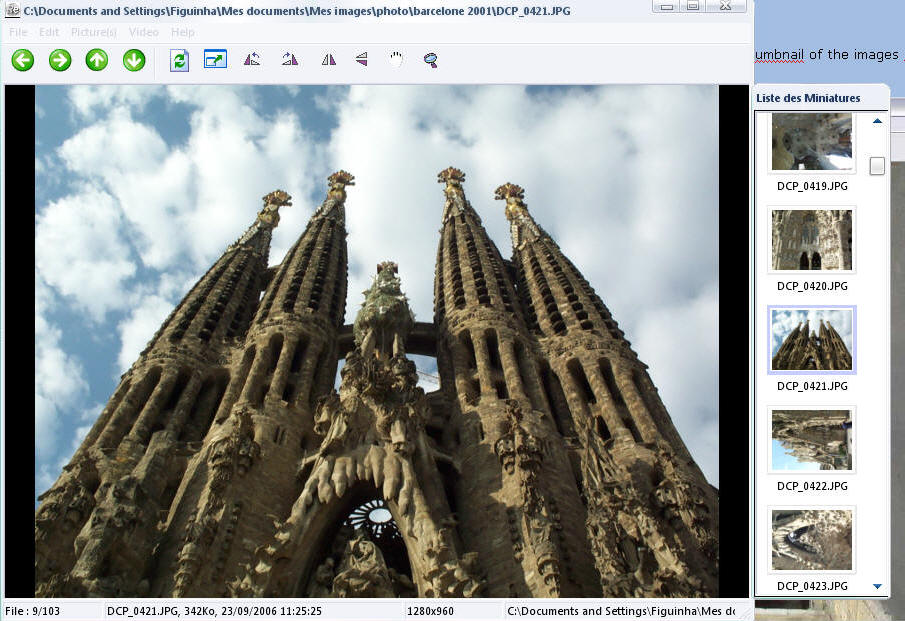
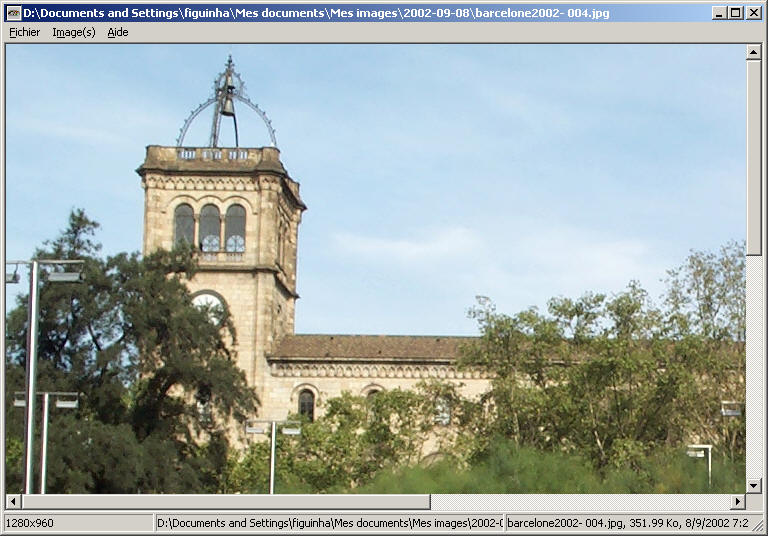
To preview a picture, it is enough to click on the file in the window of right-hand side.
Caution!!! Only the files recognized by the software are
shown.
If
you wish to see the Picture in a separate window, it is necessary for you to double-to click on
the picture. (see chapter 4 - Picture viewer)
By selecting an Picture, it is possible to put it on
window wallpaper. You just need to go to "tools -> wallpaper" Menu. Three choices are offered to you:
Center: Center the Picture on your desk.
Mosaic: Filled your office with the same
Picture.
Stretch: Stretch the Picture to fill all your office.
1-5) Delete thumbnail database
Go to View and to click on Generate thumbnail.
The base of the thumbnail will be re-initialized.

You can sort your files by: Name, Size and Date.
This sorts will be safeguarded when you pass in
window mode to view your picture.
By default, the preview is in High Quality.
You can associate Regards to window explorer.
For that it is enough for you
to go in the menu “Edition - > Associate Regards to the picture”.
The regards readable picture will be
visible starting from the module of visualization of the Pictures.
The files can be copied or moved starting from the list of the files towards a
folder.
Two means are possible.
- By the contextual menu, while choosing “Copy to…” or “Move to…”. It will be asked to choose a folder.
- By Drag and drop. You just select files and move to
destination folder. You must guard the mouse button on. If you kept inserted key CRTL,
your files will be copied if not they will be moved.
You can cancel the move of your files by pressing the ESC key.
You can select all file by clicking keys CRTL+A.
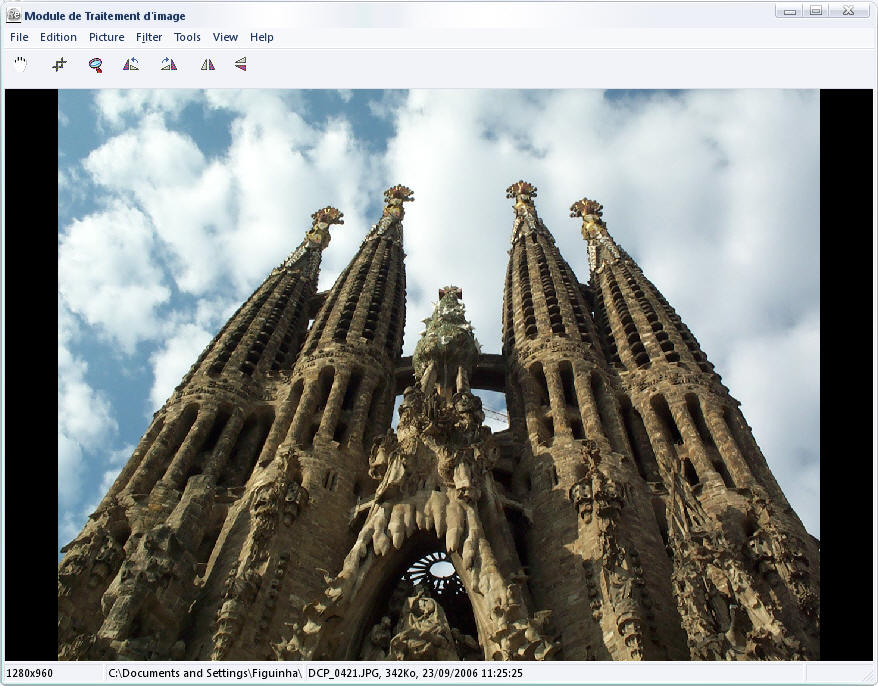
2) Picture viewer (tool ->View Picture)
2 - 1) Presentation of picture viewer window
The module of visualization is an advanced tools for
viewing picture.
It allows you:
- Navigate into your folder in a circular way
- Zoom and rotate picture
- Fullscreen mode
- Run picture into a diaporama
- Apply interpolation effects
The viewer module was developed to navigate very fast into a folder. You just need to push the space bar.
List buttons:
|
|
Go to the previous picture |
|
|
Go to the next picture |
|
|
Go to the first picture of this folder |
|
|
Go to the last picture of this folder |
|
|
Reload the picture |
|
|
Fullscreen mode |
|
|
Rotate 90° |
|
|
Rotate 270° |
|
|
Horizontal mirror |
|
|
Vertical mirror |
2 - 2) Navigation into the folder
Caution!!! Only recognised picture will be shown.
The bar of
status (Bar located in bottom of the window) informs you:
- > the dimension of the Picture
- > the folder in progress
- > the file show
Navigation is carried out in the repertory in progress.
To go to the next picture :
Go to picture menu (S) - > Visualization - > Next
Picture
or
Click with the right button of the mouse then Visualization - >
Next picture
or
To press the page down key
To go to the previous picture :
Go to picture menu (S) - > Visualization - > Previous
picture
or
Click with the right button of the mouse then Visualization - >
Previous picture
or
To press the Page
Up key
2 - 3) Zoom and rotate picture
It is allowed to you to zoom into a picture.
To increase the zoom on
a picture :
Go to the picture menu - > Zoom - > Zoom More
or
Click with the right button of the mouse then Zoom - > Zoom More
or
To press the
+ key
To decrease the zoom on a picture :
Go to the picture menu - > Zoom - > Zoom Less
or
Click with the right button of the mouse then Zoom - > Zoom Less
or
To press the
- key
2-3-2) Rotate or Flip a Picture
To carry out a rotation on your Picture:
You have 2 choices:
90° in the direction of the needles of a watch or in the
inverse direction.
In the direction of the needles of a watch:
Go to the picture menu - > Rotate Picture - > 90°CCW
or
Click with the right button of the mouse then
Picture (S) - > Rotate Picture - > 90°CCW
or
Press the "2" key
In the direction reverses needles of a watch:
Go to the picture menu- > Roter Picture - > 90°CW
or
Click with the right button of the mouse then
Picture (S) - > Roter Picture - > 90°CW
or
Press the key 8
To flip a picture :
In the horizontal direction:
Go to the picture menu- > Roter Picture - > Horizontal Flip
or
Click with the right button of the mouse then
Picture (S) - > Roter Picture - > Horizontal Flip
or
Press the key 4
In the Vertical direction:
Go to the picture menu- > Roter Picture - > Vertical Flip
or
Click with the right button of the mouse then
Picture (S) - > Roter Picture - > Vertical Flip
or
Press the key 6
Fit a Picture
into the window size :
Go to the picture menu and click Auto Dimension Picture in AUTO position.
To enter into the full screen mode, it is
enough to touch Enter or to go to the Picture menu -
>Visualisation-> Full Screen
To return in
the window mode, it is enough to touch the Esc key.
The diaporama makes it possible to create a
slideshow with picture.
By default, the
values of the diaporama are :
- 2
seconds times between each
Picture
- Run by forward and in full Screen
mode
-
Picture fit the screen.
If these parameters are not appropriate to you, you can change them while clicking on the menu Picture - > Diaporama->Configure Diaporama.

To start the diaporama, it is enough for you to click on
Start or:
Picture (S) - >Diaporama->Start Diaporama
or
touch the key D
To stop the diaporama, it is enough for you to click on:
the menu
Picture - >Diaporama->Stop Diaporama or on the key S
You have the possibility during navigation to see the thumbnail of the Pictures before and afterwards compared to the shown Picture.
2-7) Navigation in the sub-directories
This option is available in the Picture Menu. It enables you to see the picture in the sub-directories in your visualization.
You can add a bookmark to your reading of video in fenestrated mode or mode full screen while supporting on the short cut keyboard SHIFT+A.
For this returning directly to your bookmark for the video in the course of reading, supporting on the short cut keyboard SHIFT+B.
2-9) View 3D file (Acceleration in OPENGL)

To move the element 3D, you can use the mouse or the keyboard.
1 - The mouse
It is enough to maintain the button left of the mouse inserted to make move the object 3D.
The serrated roller of the mouse allows zoomer on this one.
2 - The keyboard:
Touch
Up and Down : Movement on the y axis
Touch left and right: Movement on the x axis
Touch Home and End: Movement on the axis of Z
Touch + and -: Zoom on the object
Touch CTRL+i: To change returned object
3) Picture processing window (tool->Picture tool)
To carry out a rotation on your Picture:
You have 2 choices:
90° in the direction of the needles of a watch or in the contrary direction.
In the direction of the needles of a watch:
Go to the picture menu- > Roter Picture - > 90°CCW
or
Click with the right button of the mouse then
Picture (S) - > Roter Picture - > 90°CCW
or
Press the key 2
In the direction reverses needles of a watch:
Go to the picture menu- > Roter Picture - > 90°CW
or
Click with the right button of the mouse then
Picture (S) - > Roter Picture - > 90°CW
or
Press the key 8
For flipper an Picture:
In the horizontal direction:
Go to the picture menu- > Roter Picture - > Horizontal Flip
or
Click with the right button of the mouse then
Picture (S) - > Roter Picture - > Horizontal Flip
or
Press the key 4
In the Vertical direction:
Go to the picture menu- > Roter Picture - > Vertical Flip
or
Click with the right button of the mouse then
Picture (S) - > Roter Picture - > Vertical Flip
or
Press the key 6
A whole set of effect is available to improve your
picture:
Negative effect (Finely
Picture->Ajustement->Négatif)
Erodes Effect (Menu Filter->Erode)
Dilates Effect (Menu Filter->Dilate)
Black
& White Effect (Menu Picture->Mode->Grey level)
Blur Effect (Menu Filtre->Flou)
Add
noise Effect (Menu Filter->Add of noise)
Resizing effect (Menu Picture->Resizing)

Luminosity and Contrast effect :

Open picture :

Choose in the Filter menu - > Lens Flare

A dialog box is
shown.
The luminosity can be regulated using the horizontal bar (luminosity).
The
move of the luminous halo is done using the mouse. It is
enough to click using the right button on the halo and its move will be done using the movement of this one.
Choice of the color of the Halo (double clicks on the red square corresponding to the halo color):
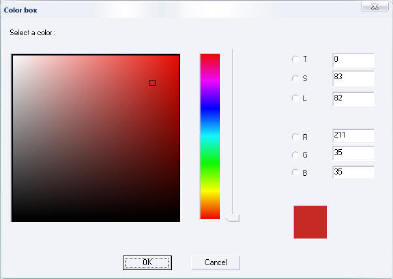
The choice of the color is done with the RGB Color Box. To choose a color is necessary for you to click on the square representing the colors compared to the selected nuance. To change this nuance, it is enough to move the cursor located on the right rectangle representing the nuances.
When the color is chosen, click on OK.
The luminous halation has changed its color and to click on OK to confirm your choice.

Here the picture after application of the filter.

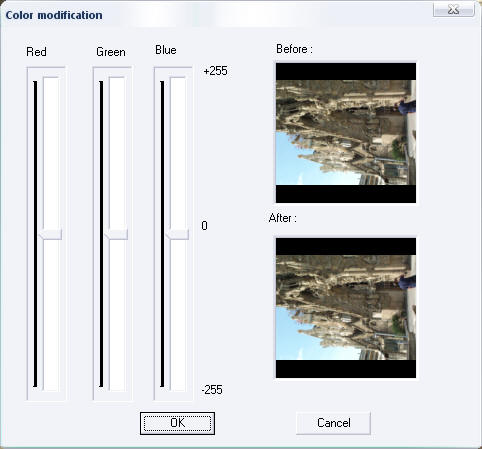
You can regulate the proportions of Red, Green and blue to obtain the adjustments on the right wished by prévisualisant them in the window in bottom.
These effects are accessible via the Filtre menu

Choose in the Filtre menu - > Clouds
You can choose the 2 basic colors which will be used to generate the cloud in double clicking on the squares of color located in lower part of “Color 1” and of “Color 2”

Once various parameters chosen, click on “OK”.


The filter of Wiener enables you to restore
blur
Pictures. It functions only with square Pictures whose their sizes is multiple
of 2.
To
make function the filter, it is necessary to determine the size of the
filter which damaged the original Picture. In the majority of the cases a
size of 5x5 will be enough.

The effect Motion Blur makes it possible to simulate the effect of a displacement of your camera during a catch.
It
is possible for you to undo the application of a filter
while going in menu edition and choose Cancel.
Caution: Each application of a filter increases the size taken by the
picture in the memory!!!
You can erase the memory with the option Erase Memory in the edition menu.
![]() The management of the albums is done starting from this button. The module is presented
in a wizard.
The management of the albums is done starting from this button. The module is presented
in a wizard.
For principle:
- To click on
Cancel causes the loss of the data in the course of treatment and firm the wizard.
- To click on Finish
safeguard work in progress but
close the wizard.
- To click on
Previous causes the loss of the data in the course of treatment and returns on the preceding form.
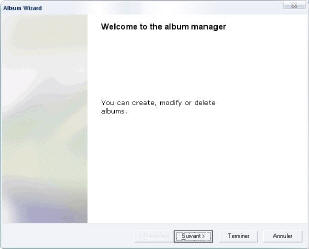
Presentation of the module - Press on Next.

To reach the
albums management, select “Manage the albums”.
Before
the creation of an album, it is strongly recommended to create the
criteria necessary to the identification of your Pictures for the search engine.
To create a category,
click on New.
New fields appears with
this default value: “Entered a new value”.
To
modify the value, double click on it or Press the F2 key.
The fields becomes writable and you can insert the new value.
To remove a category, it is enough for you to select the category
in question and Press the the delete button.
If you have done all the modifications, press on the Ok button to save them. If
you don't want to save, click on Cancel.

To create an album, choose “Create a new album” then press on Next.

Creation of an album Dialog Box :
1 - Enter a name for the album. (Fields obligatory)
2 -
Select a folder. To click in the "..." button to choose a folder.
3 - Pictures files selected.
4 - List
Pictures which will be stored in the album.
5 - Add the Picture selected in the list of the Pictures of the current folder.
6 - Add all the Pictures available in the current
folder.
7 - Delete the Picture selected in the list of the Pictures selected.
8 -
Delete all the Pictures of the list of the Pictures selected.
9 - Picture available in the current directory.
Click next to go to the next stage or click on finish to quit the wizard.

The next stage enables you to manage attributes for the pictures contained in your album. To modify the value for the category, it is enough for you double to click above or of press on the F2 key. The fields becomes writable and you can insert the new value.

The operation finish successfuly, click on “Finish” to leave the wizard.
The album creates appears under the tree structure “Album” of the list of the folder.
To modify an album, choose “Modify an album” then press on Next.

Choose an album in the albums list then press on Next.

Modification of an album Dialog Box :
1 -
Enter a name for the album. (Fields obligatory)
2 -
Select a folder. To click in the "..." button to choose a folder.
3 - Pictures files selected.
4 - List
Pictures which will be stored in the album.
5 - Add the Picture selected in the list of the Pictures of the current
folder.
6 - Add all the Pictures available in the current folder.
7 - Delete the Picture selected in the list of the Pictures selected.
8 -
Delete all the Pictures of the list of the Pictures selected.
9 - Picture available in the current directory.
Click next to go to the next stage or click on finish to quit the wizard.
The next stage enables you to manage attributes for the pictures contained in your album. To modify the value for the category, it is enough for you double to click above or of press on the F2 key. The fields becomes writable and you can insert the new value.
The operation finish successfuly, click on “Finish” to leave the wizard.
To remove an album, choose “Delete an album” and press on Next.
Select the album to be removed and press on Next. A message will warning you. Click on “Yes” if you really want to remove the album.
The operation finish successfuly, click on “Finish” to leave the wizard.
The attributes can modify manually for each Picture. Go in an album. Choose a Picture. Make a click right on the Picture. Choose “Attributes Management”. Enter the different value for this picture. Click on OK to confirm the modifications or click on Cancel.
4-6) Manual creation of an album
You can create an album starting from the Album node int the folder tree view. For that, press on the right button of the mouse on this node. Choose “Create a new album”. Enter the name of your new album. Your album will be appeared in the tree structure of the Albums.
4-7) Manually add Pictures to an album
You can drag and drop picture directly into an album from the explorer window. You can cancel the move of your files while pressing on the ESC.
4-8) Manual removal of an album
Go to the album of your choice.
Make a click right on this one.
Choose
Delete.
Confirm your choice.
Go on the album of your choice.
Make a click right on this one.
Choose Rename.
The album name becomes writable.
To enter the
new name.
![]() Press on this button to go to the search form.
Press on this button to go to the search form.
| 5 - 1) Research Normal | |
 |
The
list of the attributes is updated by the application to each posting of
the form of search. It contains a form of 5 fields. Each field has a
drop-down list with the list of the attributes available and a free
zone of seizure to indicate the value to be sought. The fields “And” enables you to make search where the criteria are associated. This type of search enables you to obtain a thorough search. The fields “Or” enables you to dissociate the search criteria to obtain a broader answer. The result is shown as a list of Picture corresponding to the search criteria in the listview with all the view available (Icon, Liste, Details, small icons, thumbnail). Navigation is carried out via the fenestration mode in double clicking on an Picture or while pressing on the “Search” key.
|
| 5-2) Advanced search | |
 |
Advanced research enables you to
define your search by specifying characteristics on the files. To show this form, it is enough to click on “advanced Search”. If you wish to make it unshow, to click on this same bond. To include in your search the characteristic desired, it is enough for you to check the box located on its line. For the dates specification, a calendar appears to facilitate the choice. To show it, it is enough for you to click on the triangle located at the right-hand side of the fields of specifications. |
This dialog box appears when you double click on a file zip.

| Extraction of one or more files zip | |
| Add one or more zip file | |
| Remove one or more file in the zip file | |
| Visualization of the file | |
| Selection of all the files |
To extract the files:
1 - To select the files which you wish to extract or
![]()
2 - Press on the button
![]() .
.
3 - Choose
the destination folder.
You can create a file zip:
1 - click right - > New - > File zip
2 - Select files or folder then click-right - > Compress in zip and to re-elect the file lately creates
Following the creation of the file zip, you have the possibility of modifying it in above clicking double.

The video reader places himself in the previsualisation part. He allows you following a click on a video or audio file recognized by Windows of the prévisualiser. If you wish, to normally view it, double to click on the file.

The reader mp3 places himself in the previsualisation part. He enables you following a click on a file mp3 to listen to it or to traverse the whole of the files mp3 available in your current directory. It is enough for you for that to use the buttons track before and track back.
To copy the file regards.scr in the Windows repertory/system32 for the versions 2000 and XP of Windows and in the Windows repertory/system for the other versions.

Duration of diaporama: Duration between each
picture (in second)
Choice of the album: Choice of the album creates in Regards
Repertory of the album: Way where the file album.db is creates in Regards
Repertory MP3: First file mp3 of the repertory where the musics will be played.

Available in small the Tools of the exploration of file Regards.
The repertory of origin: Repertory where are stored the
Pictures to re-elect
The repertory of destination: Repertory where will be stored the
Pictures converted or re-elected.
The wording of the
Picture: The name which will be reproduced on all the Pictures to re-elect: example: Motor Show 2000
Cut numbers: Indicate the number of numbers to be indicated in the name of the files
Desired incrementing: from 1 in 1 of 10 in 10 etc…
The position of the numbers: before or after the name of the
Picture (Right-hand side = Before and Left = Aprés)
For information: It is obligatory to select the format of the
Pictures
Conversion of the format: Allows to save the
Pictures under another format -!!! Obligatory for redimmensionnement!!!
To remove the
Picture…: The Pictures of the repertory of origin aprés conversion makes it possible to clean
Redimmensionnement: Redimmensionner allows all the
Pictures with application of a filter to increase the quality of the Picture.
To launch conversion, support on OK. You can constantly stop conversion while supporting to Annuler.
The catalog module enable you to index the Pictures contained on your hard disk or on your CD-ROMS. The search engine associated will enable you to make research between different catalogues to know if pictures are already present in other folder or CD-ROM.

To create a catalogue, to click on Create a catalogue.

Choose a folder and click on OK.
The catalog will contain the name of the choose folder.
Click on Search.

3 stages are necessary for you to carry out a search.
1st stage: Select the catalog sources. This selection enables you to define the catalogues from which the other catalogues will be compared.
2nd stage: Select of the catalogues where the source files will be compared. They must be imperatively different from the catalogues sources.
3rd stage: Writing the chain of search. The Boolean expression will be used for the comparison of the various Pictures.
Report/ratio

At the end of research a report/ratio HTML will be generated.

The list of the Pictures in double will be shown in the list window. You have the possibility of removing them.
To remove a catalog, it is enough to click on the right key of the mouse then to choose “Remove”. After, you need To confirm on pressing the “OK” button on the dialog box.
10-5) Compress catalog database
The catalog compression enables you to remove old physically files removed. It is advised to carry out it following the removal of a catalogue containing many bonds towards Pictures.